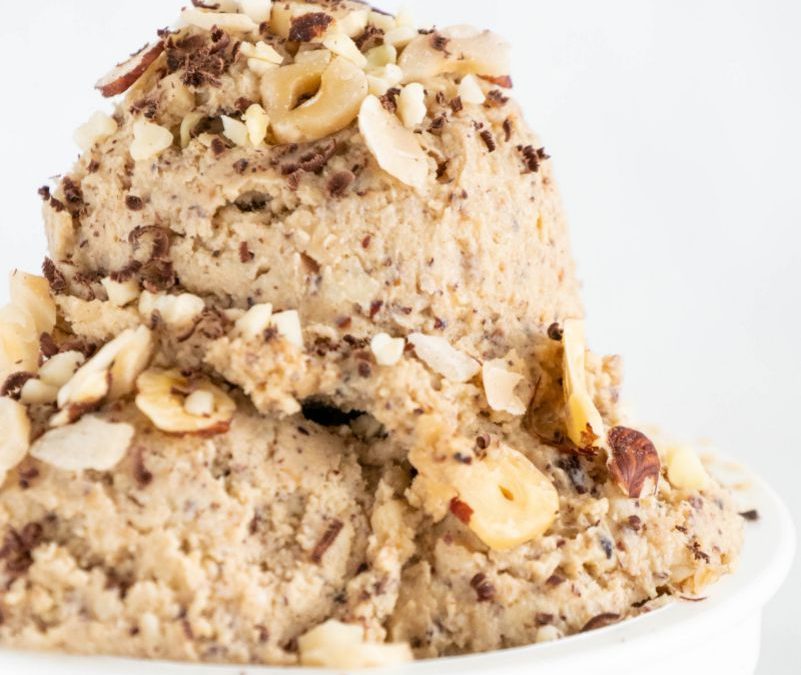
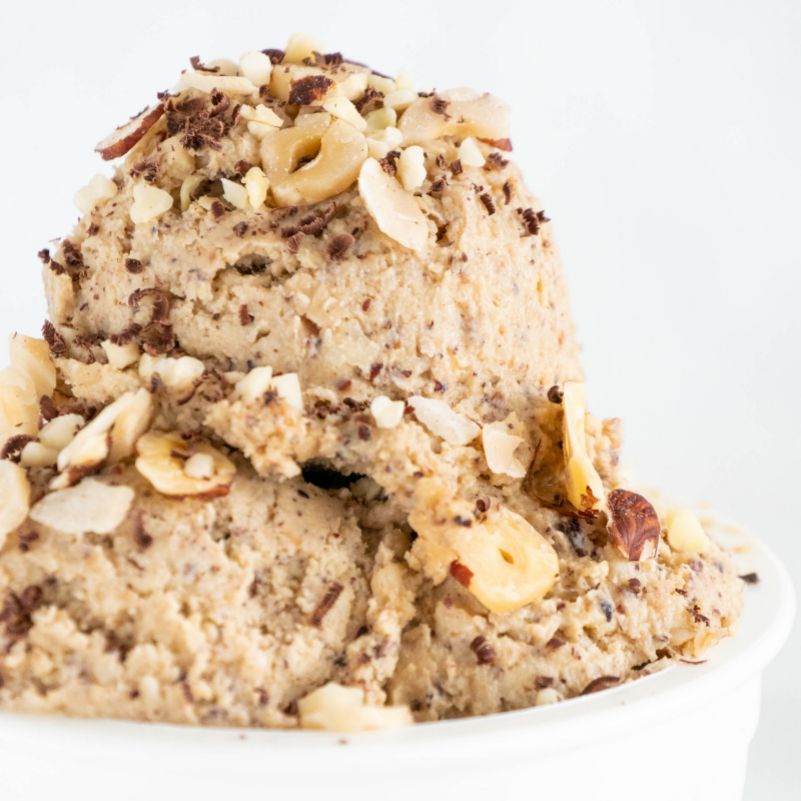
Making your own sugar free keto hazelnut ice cream is super easy! The result is incredibly creamy and 100% low carb with only 2.8g net carbs per serving!
Add the ground hazelnuts into a small pan.
Roast the ground hazelnuts for approx. 4-5 min on low-medium heat until they change the color from pale beige to golden yellow.
☝︎ Make sure to stir frequently and keep an eye on the hazelnuts!
They can burn incredibly fast and they can't be used any more once they are burned (trust me, happened to me more than once ????).
Transfer the roasted ground hazelnuts from the pan into a small (preferably non-sticking) pot.
Scrape out the vanilla pod and add the seeds as well as the scraped out pods into the pot as well.
Add the heavy cream to the pot and set the heat to medium.
Bring it to a boil.
Keep stirring while the heavy cream begins to boil.
☝︎ It's easier to do this in a non-sticking pot and on medium-high heat instead of high heat.
Both will help to avoid burning the heavy cream.
In a separate bowl, whisk the eggs and the powdered erythritol until you get a foamy, pale yellow-colored mixture.
☝︎ The bowl should be big enough to hold both the egg mixture and the heavy cream mixture.
If you prefer a smooth texture without the hazelnut crunch, this is the time to sift your heavy cream-hazelnut mixture.
This step will remove the ground hazelnuts and will leave you with a hazelnut-infused heavy cream mix.
Both versions taste very good and it depends on your personal preferences (do you prefer a crunchy texture or a smooth texture?) if you want to go through the extra step.
☞ The unsifted hazelnut ice cream has more carbs but it is also more filling.
The sifted hazelnut ice cream has a very smooth and "ice cream"-like texture.
It also has fewer carbs and calories (because of the removed nuts) but you will also only get 4 servings instead of 6.
If you want to go for the smooth texture, sift the hazelnut-infused heavy cream through a kitchen strainer or a kitchen towel before proceeding to the next step.
Place the big bowl with the egg mixture on top of a pot that's filled with water.
This will be our self-made double boiler for this time being.
Bring the water in the pot to a boil and start to drizzle in the hazelnut-infused heavy cream into the egg mixture.
All of the heavy cream-hazelnut-mix is going to be added into the bowl with the egg mixture.
Keep stirring constantly for approx. 5-7 minutes until the mixture thickens up.
☝︎ The mixture is thick enough once you can dip a metal spoon in the mix and the backside of the spoon remains covered.
(It should look like a thin layer covering a spoon - if it rather looks like something reminding you of a spiderweb - keep stirring for a bit longer.)
Let the mixture cool down and chill it in the fridge for at least 30 minutes.
(Optional): Add a few chopped hazelnuts at this point if you prefer your ice cream extra crunchy!
Follow the specific instructions of your personal ice cream maker.
If you decide to add a few extra hazelnuts for the extra crunch, do so only in the last 15 minutes or so.
Adding them earlier may cause problems in some kinds of ice cream makers.
(Optional): Add 2-3 tsp of vodka or gin.
This will lower freezing point and improve consistency of your ice cream.
This is especially recommended if you decide to go for the sifted version of this ice cream.
If you leave the ground hazelnuts in the ice cream, it isn't as necessary.
Place the bowl in your freezer.
Stir the mixture every 60 minutes for the first two hours and every 30 minutes afterward.
I've found that the ice cream has the best consistency after approx. 5 hours in the freezer.
So if you start in the morning you should be able to enjoy your perfect keto hazelnut ice cream in the afternoon.
BUT:
You can also store the ice cream for a while in your freezer and achieve a similar consistency by taking out the ice cream approx. 15-25 minutes before you plan on enjoying it.
Don't worry if it's rock solid when you take it out of the freezer, that's normal and the consistency will be great once the 15-25 min are over!
Enjoy!
Fill your ice cream into a suitable container.
I recommend consuming the ice cream within 1-2 weeks.
Our ice cream doesn't contain any preservatives, that's why it isn't as durable as store-bought ice cream.
(It probably won't last long anyway because it's sooo delicious!)
*This post contains affiliate links. If you buy something through one of those links, I will receive a small commission at no extra cost to you.
Thank you for supporting my site!
**(I try to be as accurate as possible with the nutrition information below, but values may vary because of natural occurring fluctuations and different products used.)
***The sifted version of this ice cream will yield 4 servings, the unsifted version will yield 6. The calories and carbs will be reduced in the sifted version, but it's difficult to calculate the accurate numbers for this scenario. For this reason, the nutrition info relates to the unsifted version.
Serving Size 1 scoop of ice cream (servings may change if you remove ground hazelnuts, see step #5 in instructions for more info)
Servings 6
- Amount Per Serving
- Calories 310
- % Daily Value *
- Total Fat 30.9g48%
- Total Carbohydrate 4.5g2%
- Dietary Fiber 1.7g7%
- Protein 5.6g12%
* Percent Daily Values are based on a 2,000 calorie diet. Your daily value may be higher or lower depending on your calorie needs.
Ingredients
Directions
Add the ground hazelnuts into a small pan.
Roast the ground hazelnuts for approx. 4-5 min on low-medium heat until they change the color from pale beige to golden yellow.
☝︎ Make sure to stir frequently and keep an eye on the hazelnuts!
They can burn incredibly fast and they can't be used any more once they are burned (trust me, happened to me more than once ????).
Transfer the roasted ground hazelnuts from the pan into a small (preferably non-sticking) pot.
Scrape out the vanilla pod and add the seeds as well as the scraped out pods into the pot as well.
Add the heavy cream to the pot and set the heat to medium.
Bring it to a boil.
Keep stirring while the heavy cream begins to boil.
☝︎ It's easier to do this in a non-sticking pot and on medium-high heat instead of high heat.
Both will help to avoid burning the heavy cream.
In a separate bowl, whisk the eggs and the powdered erythritol until you get a foamy, pale yellow-colored mixture.
☝︎ The bowl should be big enough to hold both the egg mixture and the heavy cream mixture.
If you prefer a smooth texture without the hazelnut crunch, this is the time to sift your heavy cream-hazelnut mixture.
This step will remove the ground hazelnuts and will leave you with a hazelnut-infused heavy cream mix.
Both versions taste very good and it depends on your personal preferences (do you prefer a crunchy texture or a smooth texture?) if you want to go through the extra step.
☞ The unsifted hazelnut ice cream has more carbs but it is also more filling.
The sifted hazelnut ice cream has a very smooth and "ice cream"-like texture.
It also has fewer carbs and calories (because of the removed nuts) but you will also only get 4 servings instead of 6.
If you want to go for the smooth texture, sift the hazelnut-infused heavy cream through a kitchen strainer or a kitchen towel before proceeding to the next step.
Place the big bowl with the egg mixture on top of a pot that's filled with water.
This will be our self-made double boiler for this time being.
Bring the water in the pot to a boil and start to drizzle in the hazelnut-infused heavy cream into the egg mixture.
All of the heavy cream-hazelnut-mix is going to be added into the bowl with the egg mixture.
Keep stirring constantly for approx. 5-7 minutes until the mixture thickens up.
☝︎ The mixture is thick enough once you can dip a metal spoon in the mix and the backside of the spoon remains covered.
(It should look like a thin layer covering a spoon - if it rather looks like something reminding you of a spiderweb - keep stirring for a bit longer.)
Let the mixture cool down and chill it in the fridge for at least 30 minutes.
(Optional): Add a few chopped hazelnuts at this point if you prefer your ice cream extra crunchy!
Follow the specific instructions of your personal ice cream maker.
If you decide to add a few extra hazelnuts for the extra crunch, do so only in the last 15 minutes or so.
Adding them earlier may cause problems in some kinds of ice cream makers.
(Optional): Add 2-3 tsp of vodka or gin.
This will lower freezing point and improve consistency of your ice cream.
This is especially recommended if you decide to go for the sifted version of this ice cream.
If you leave the ground hazelnuts in the ice cream, it isn't as necessary.
Place the bowl in your freezer.
Stir the mixture every 60 minutes for the first two hours and every 30 minutes afterward.
I've found that the ice cream has the best consistency after approx. 5 hours in the freezer.
So if you start in the morning you should be able to enjoy your perfect keto hazelnut ice cream in the afternoon.
BUT:
You can also store the ice cream for a while in your freezer and achieve a similar consistency by taking out the ice cream approx. 15-25 minutes before you plan on enjoying it.
Don't worry if it's rock solid when you take it out of the freezer, that's normal and the consistency will be great once the 15-25 min are over!
Enjoy!
Fill your ice cream into a suitable container.
I recommend consuming the ice cream within 1-2 weeks.
Our ice cream doesn't contain any preservatives, that's why it isn't as durable as store-bought ice cream.
(It probably won't last long anyway because it's sooo delicious!)
*This post contains affiliate links. If you buy something through one of those links, I will receive a small commission at no extra cost to you.
Thank you for supporting my site!
**(I try to be as accurate as possible with the nutrition information below, but values may vary because of natural occurring fluctuations and different products used.)
***The sifted version of this ice cream will yield 4 servings, the unsifted version will yield 6. The calories and carbs will be reduced in the sifted version, but it's difficult to calculate the accurate numbers for this scenario. For this reason, the nutrition info relates to the unsifted version.